
In this blog, we will show you how to build a Retrieval-Augmented Generation (RAG) chatbot using Langflow and Upstash Vector. We'll leverage the integration of Upstash Vector with Langflow to create a chatbot that combines the power of large language models (LLMs) with vector search capabilities.
For the LLM component, we'll use OpenAI's gpt-4o-mini, which is available as a Langflow component.
Langflow is a tool that simplifies building complex LLM workflows by using graph-based structures. It offers many integrations, including Upstash Vector, which makes it easy to add vector-based search to your applications.
You can also download the complete workflow file from here.
1. Setting Up the Project
There are several ways to use Langflow. You can install it locally, use the Langflow Docker image, or access it directly from the DataStax website.
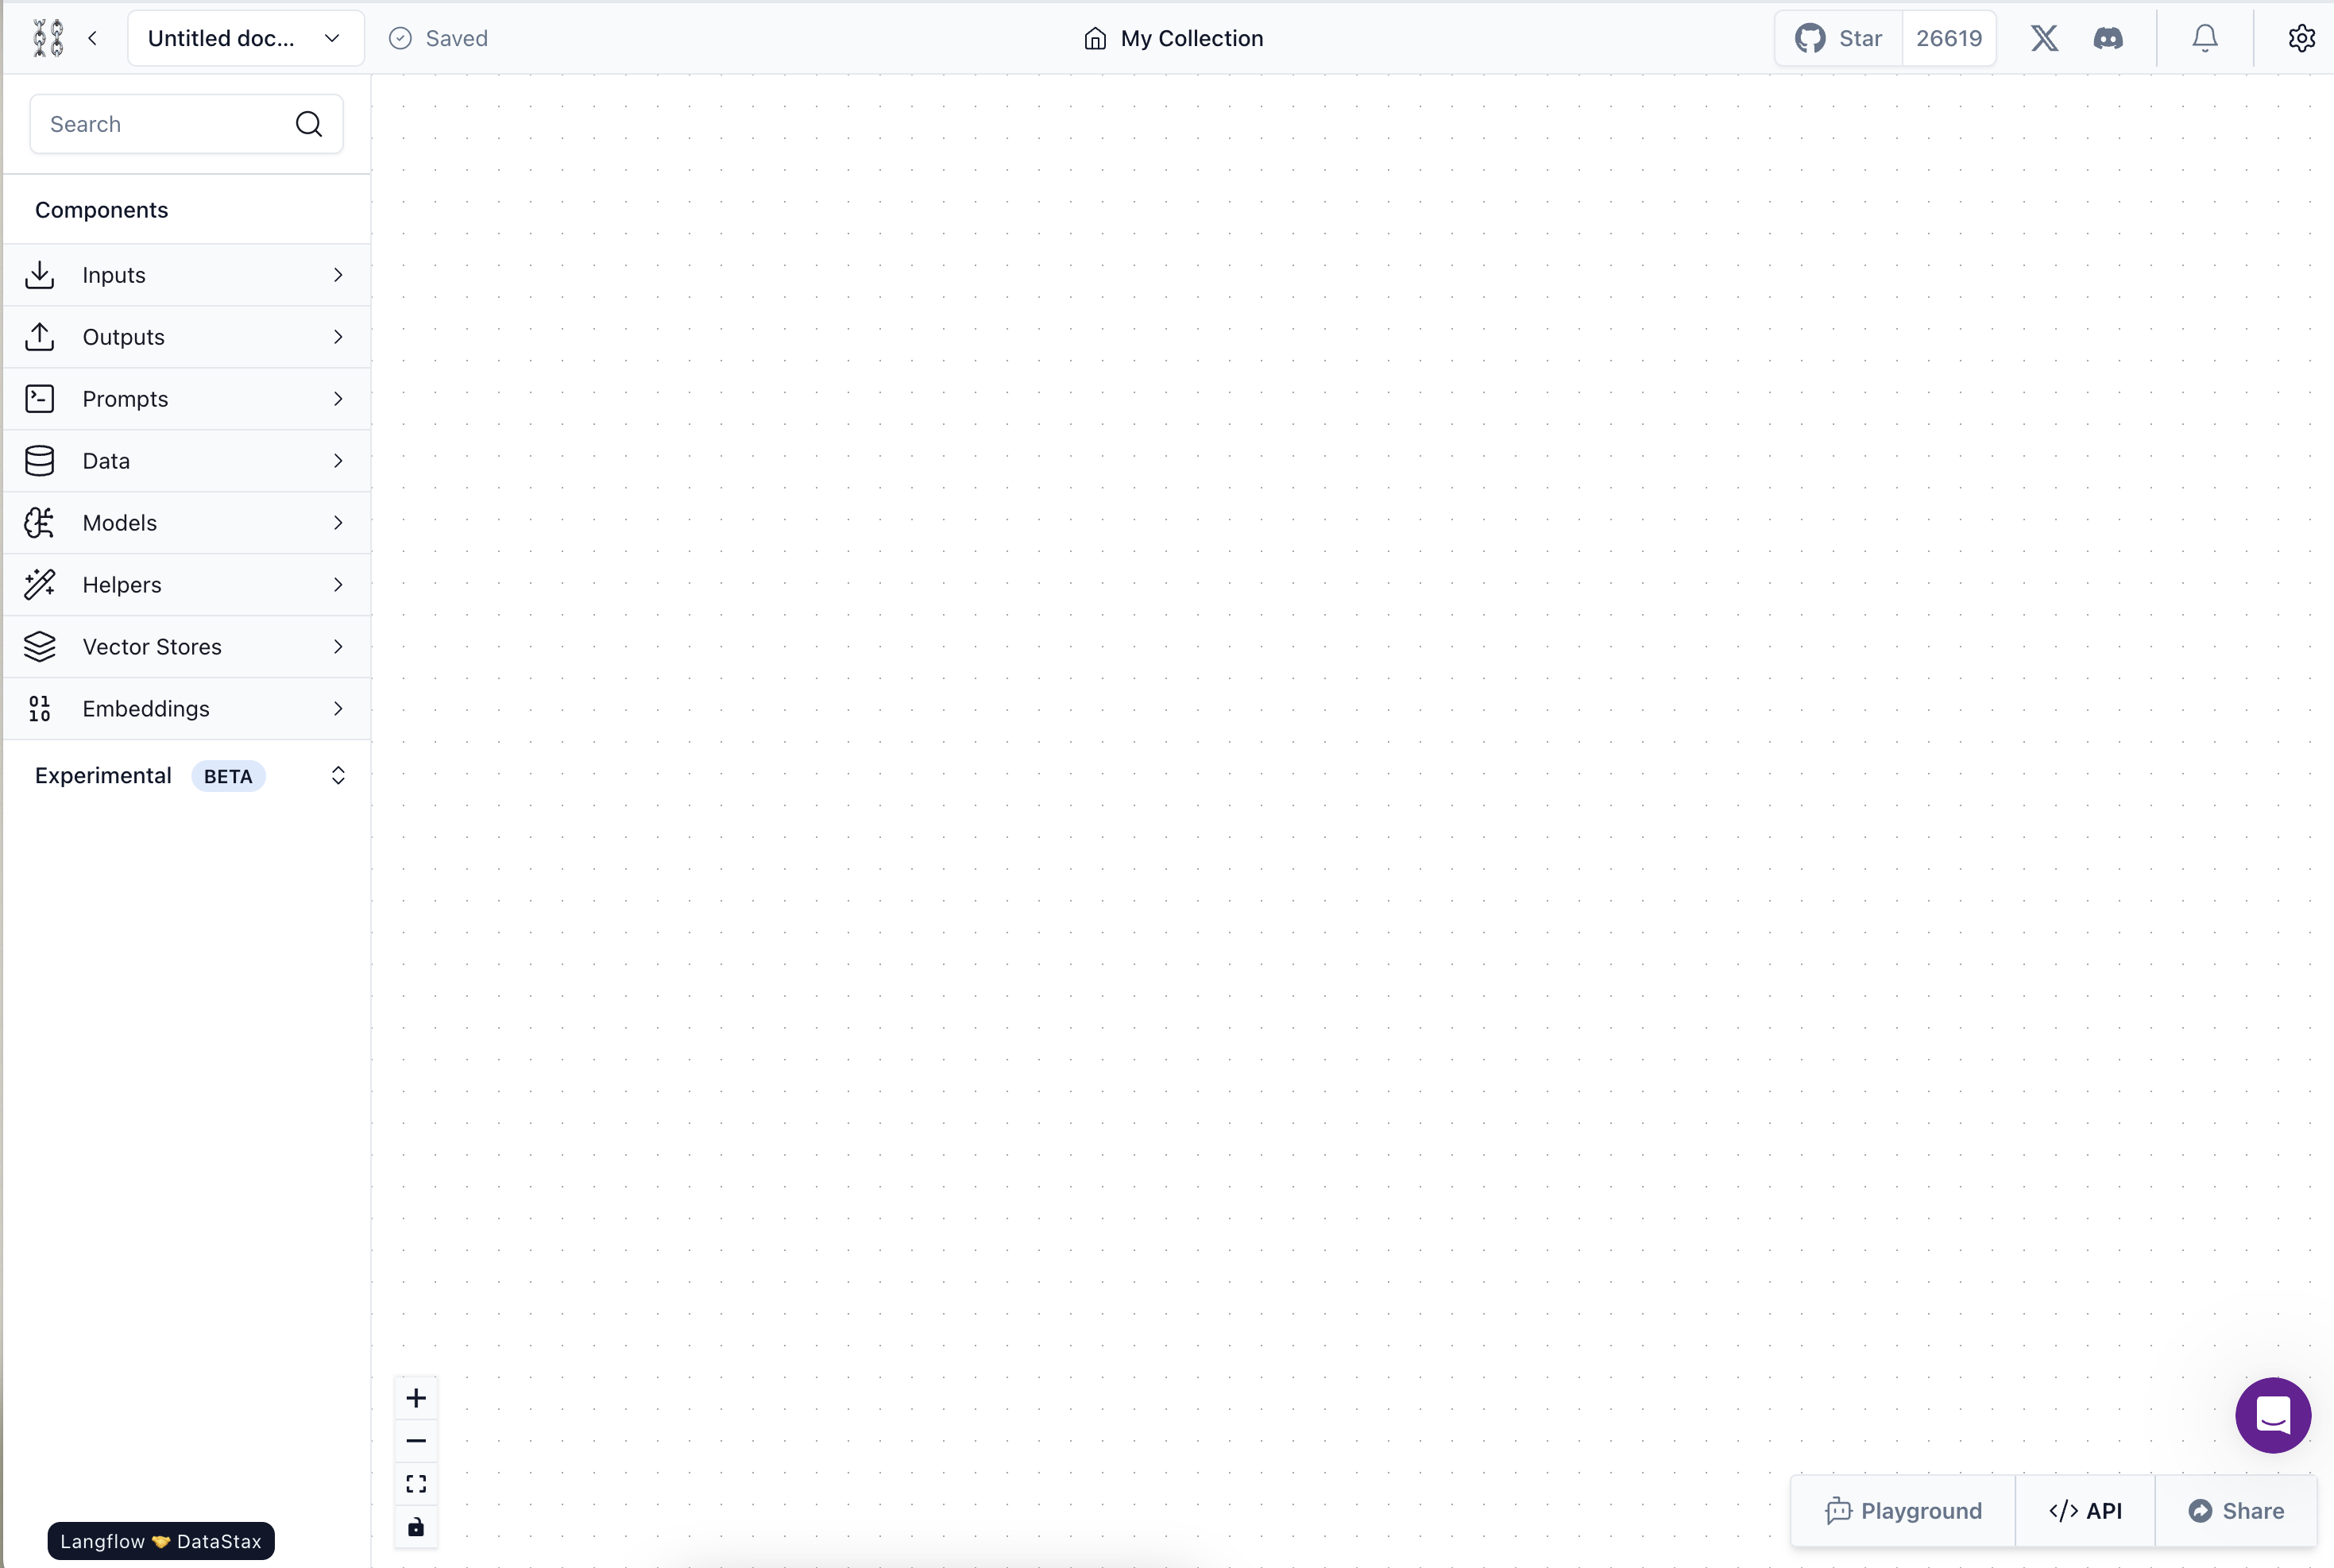
Go to DataStax Langflow dashboard and create a new project with the "Blank" template.
2. Creating a Simple Chatbot
Let's start by creating a basic OpenAI chatbot that echoes back the user's input. In Langflow, you can create nodes by searching for them in the left panel and dragging them onto the canvas.
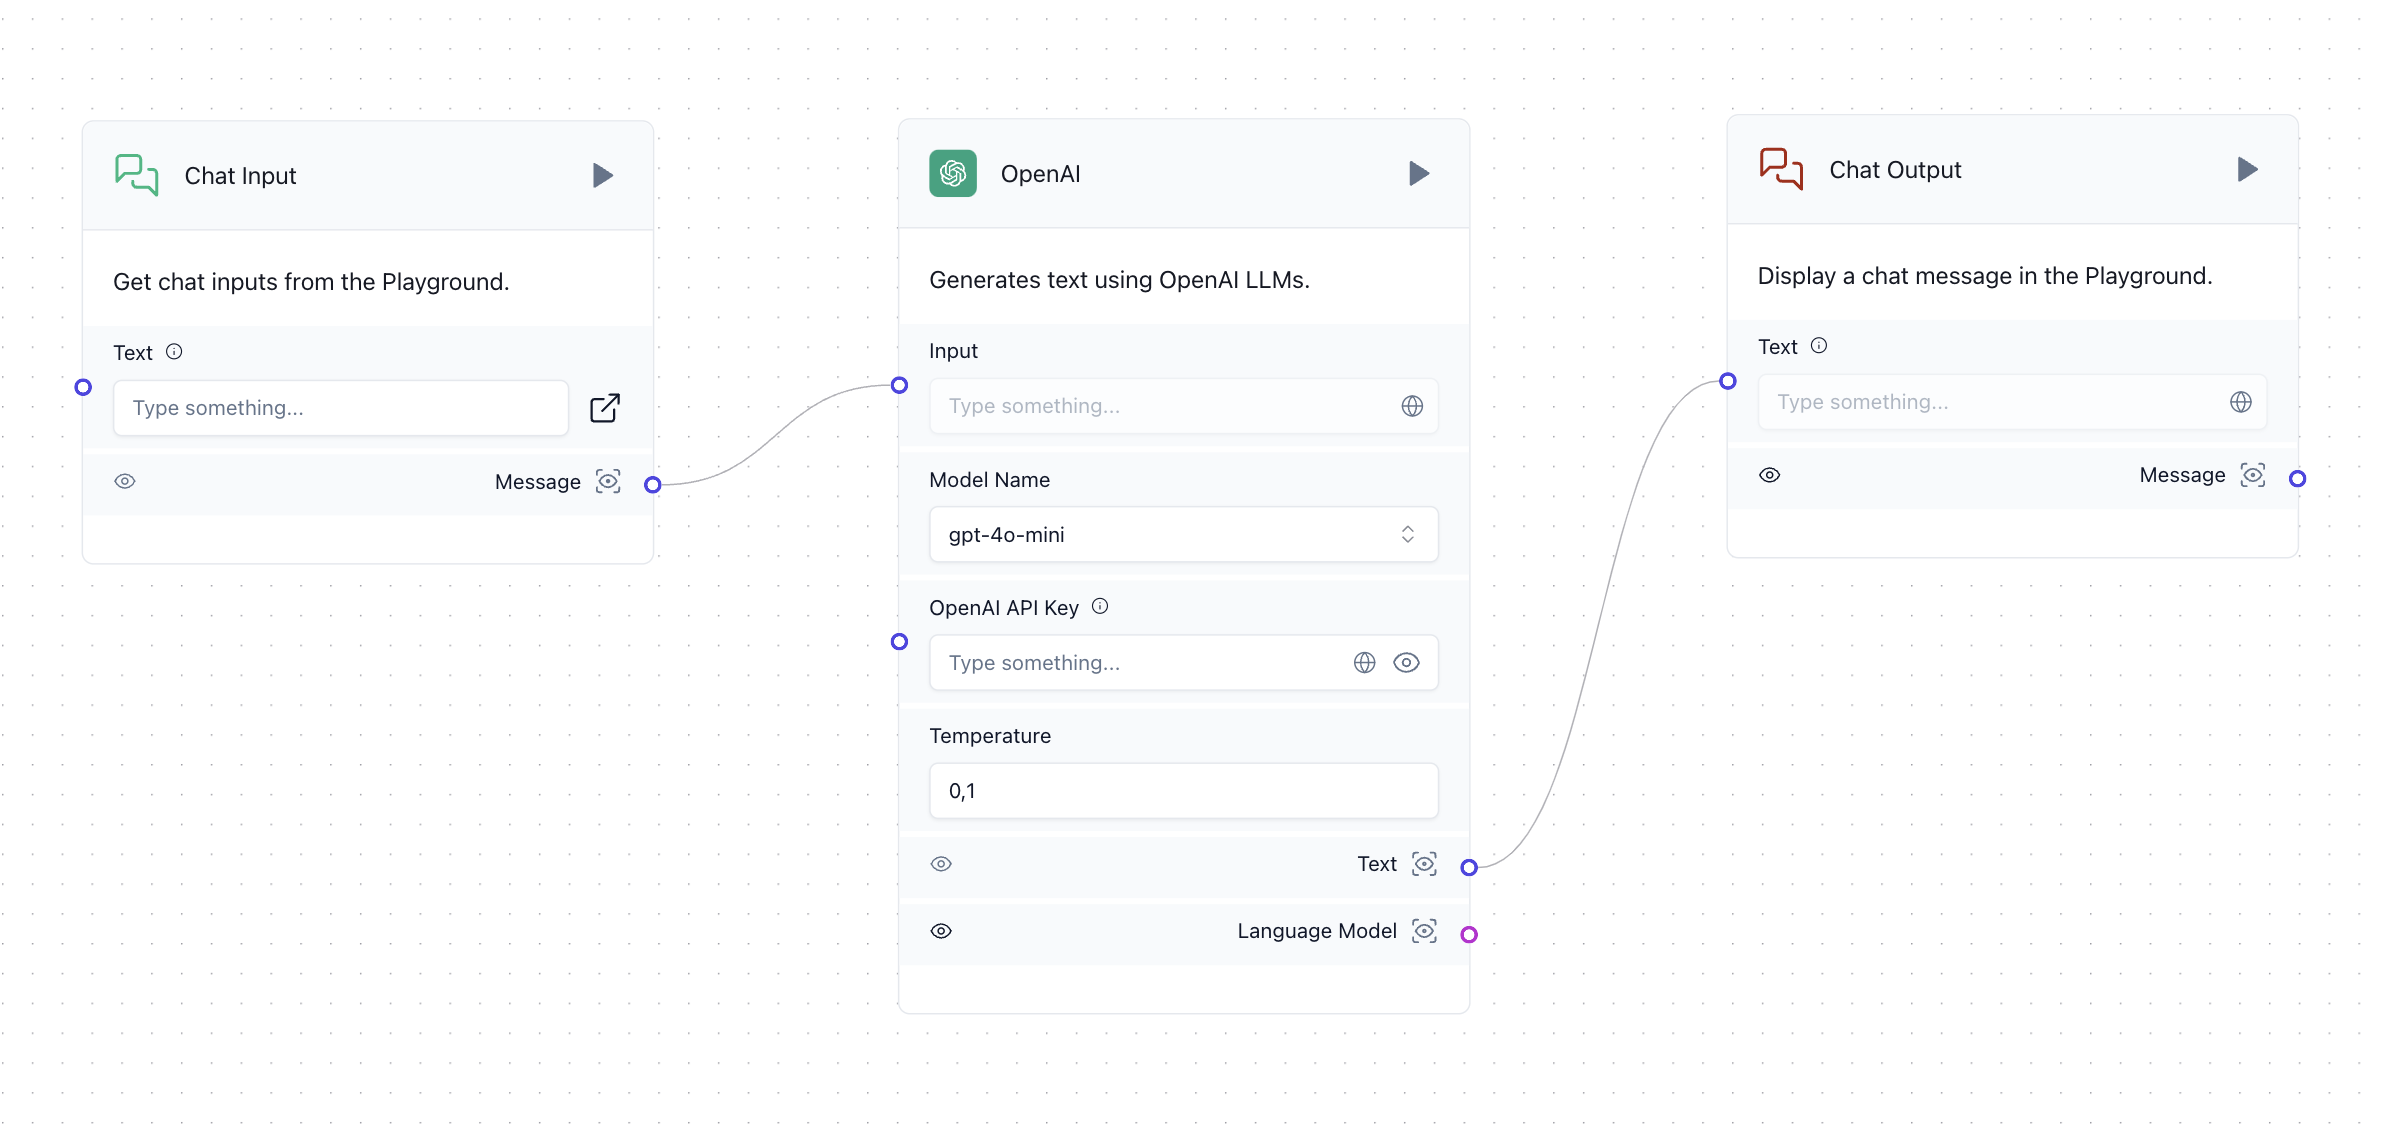
Langflow works by connecting inputs and outputs of different components. You can run the workflow by clicking the run button on the component you want to execute. You can also view the output of a component by clicking the eye icon next to the output connection.

3. Adding the OpenAI API Key
To make this workflow functional, you will need an OpenAI API key. You can create one from the OpenAI dashboard.
It's best practice to avoid entering your API key directly in the workflow. Instead, add it as a global environment variable.
To do this:
- Click the globe icon next to the "OpenAI API Key" input.
- Select "Add Environment Variable."
- Make sure to set the variable type to "Credential."
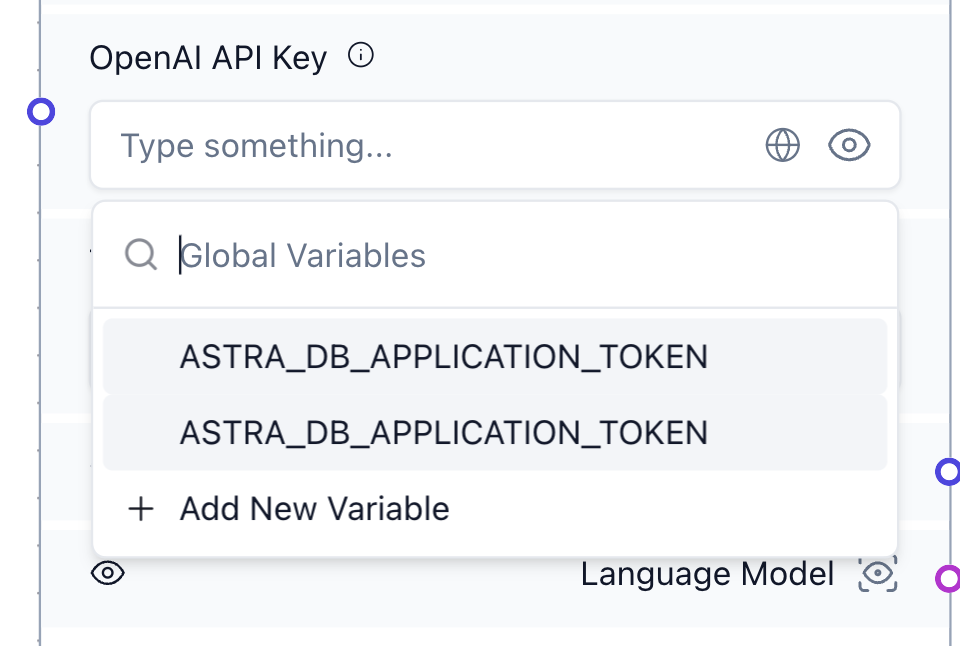
After setting the environment variable, you can test the chatbot. Enter some text into the "Chat Input" component and press the "Run" button on the OpenAI component. The small eye icon next to the output connections shows the result of the current run.

4. Creating an Upstash Vector Index
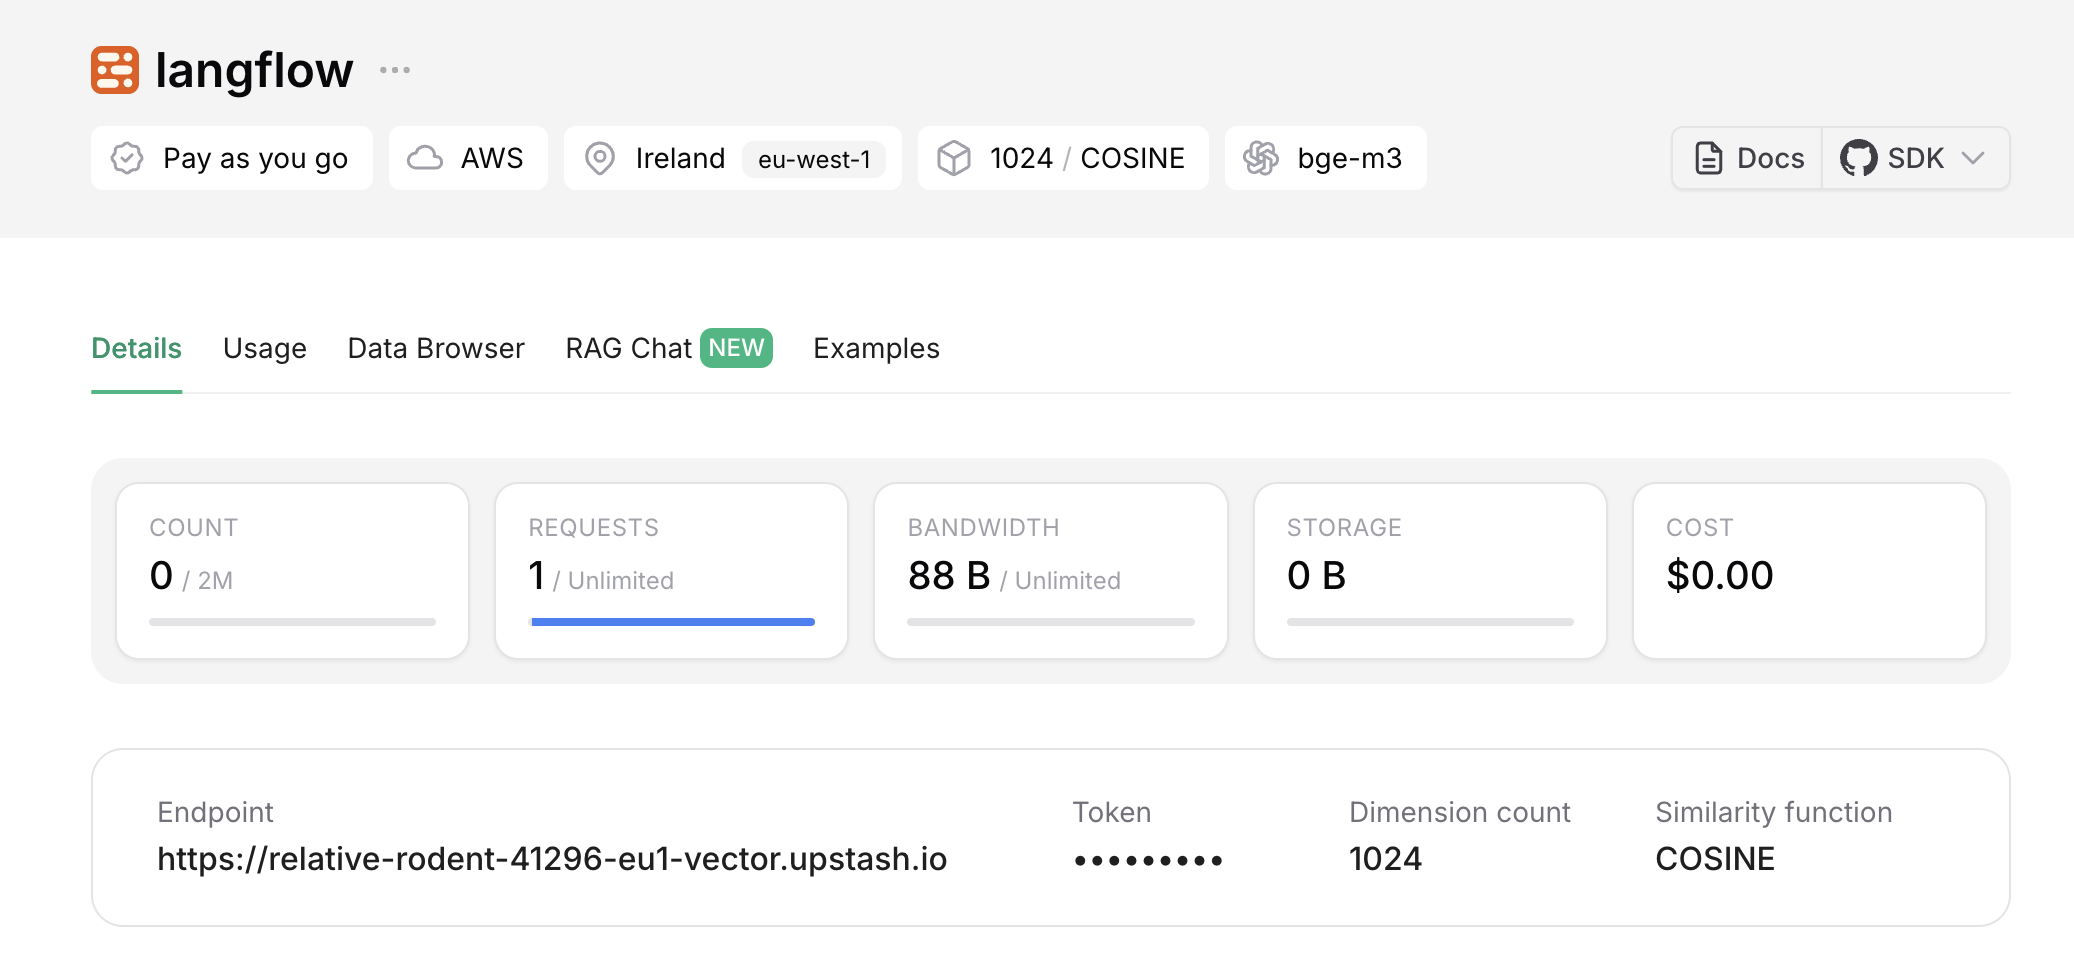
Next, we’ll create an Upstash Vector index. Go to the Upstash console, click the "Create Index" button, and follow the steps to create a new free index.
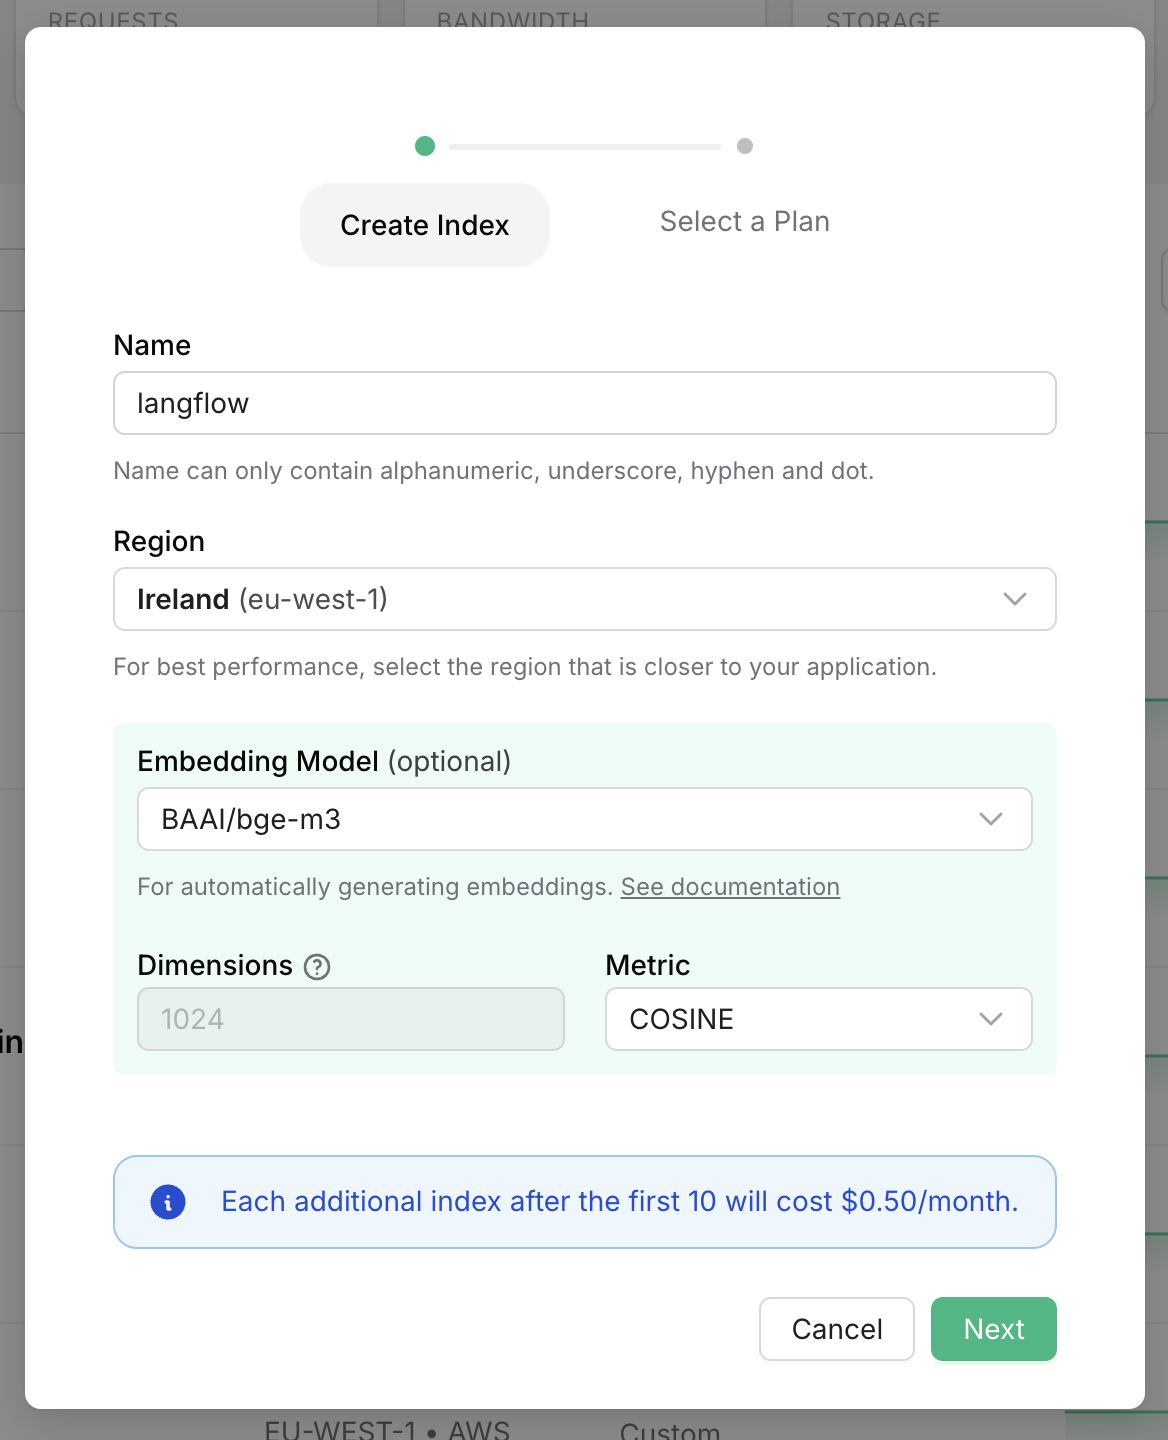
Choose an embedding model from the list. For this example, we’ll use bge-m3.
5. Inserting Data into the Upstash Vector Index
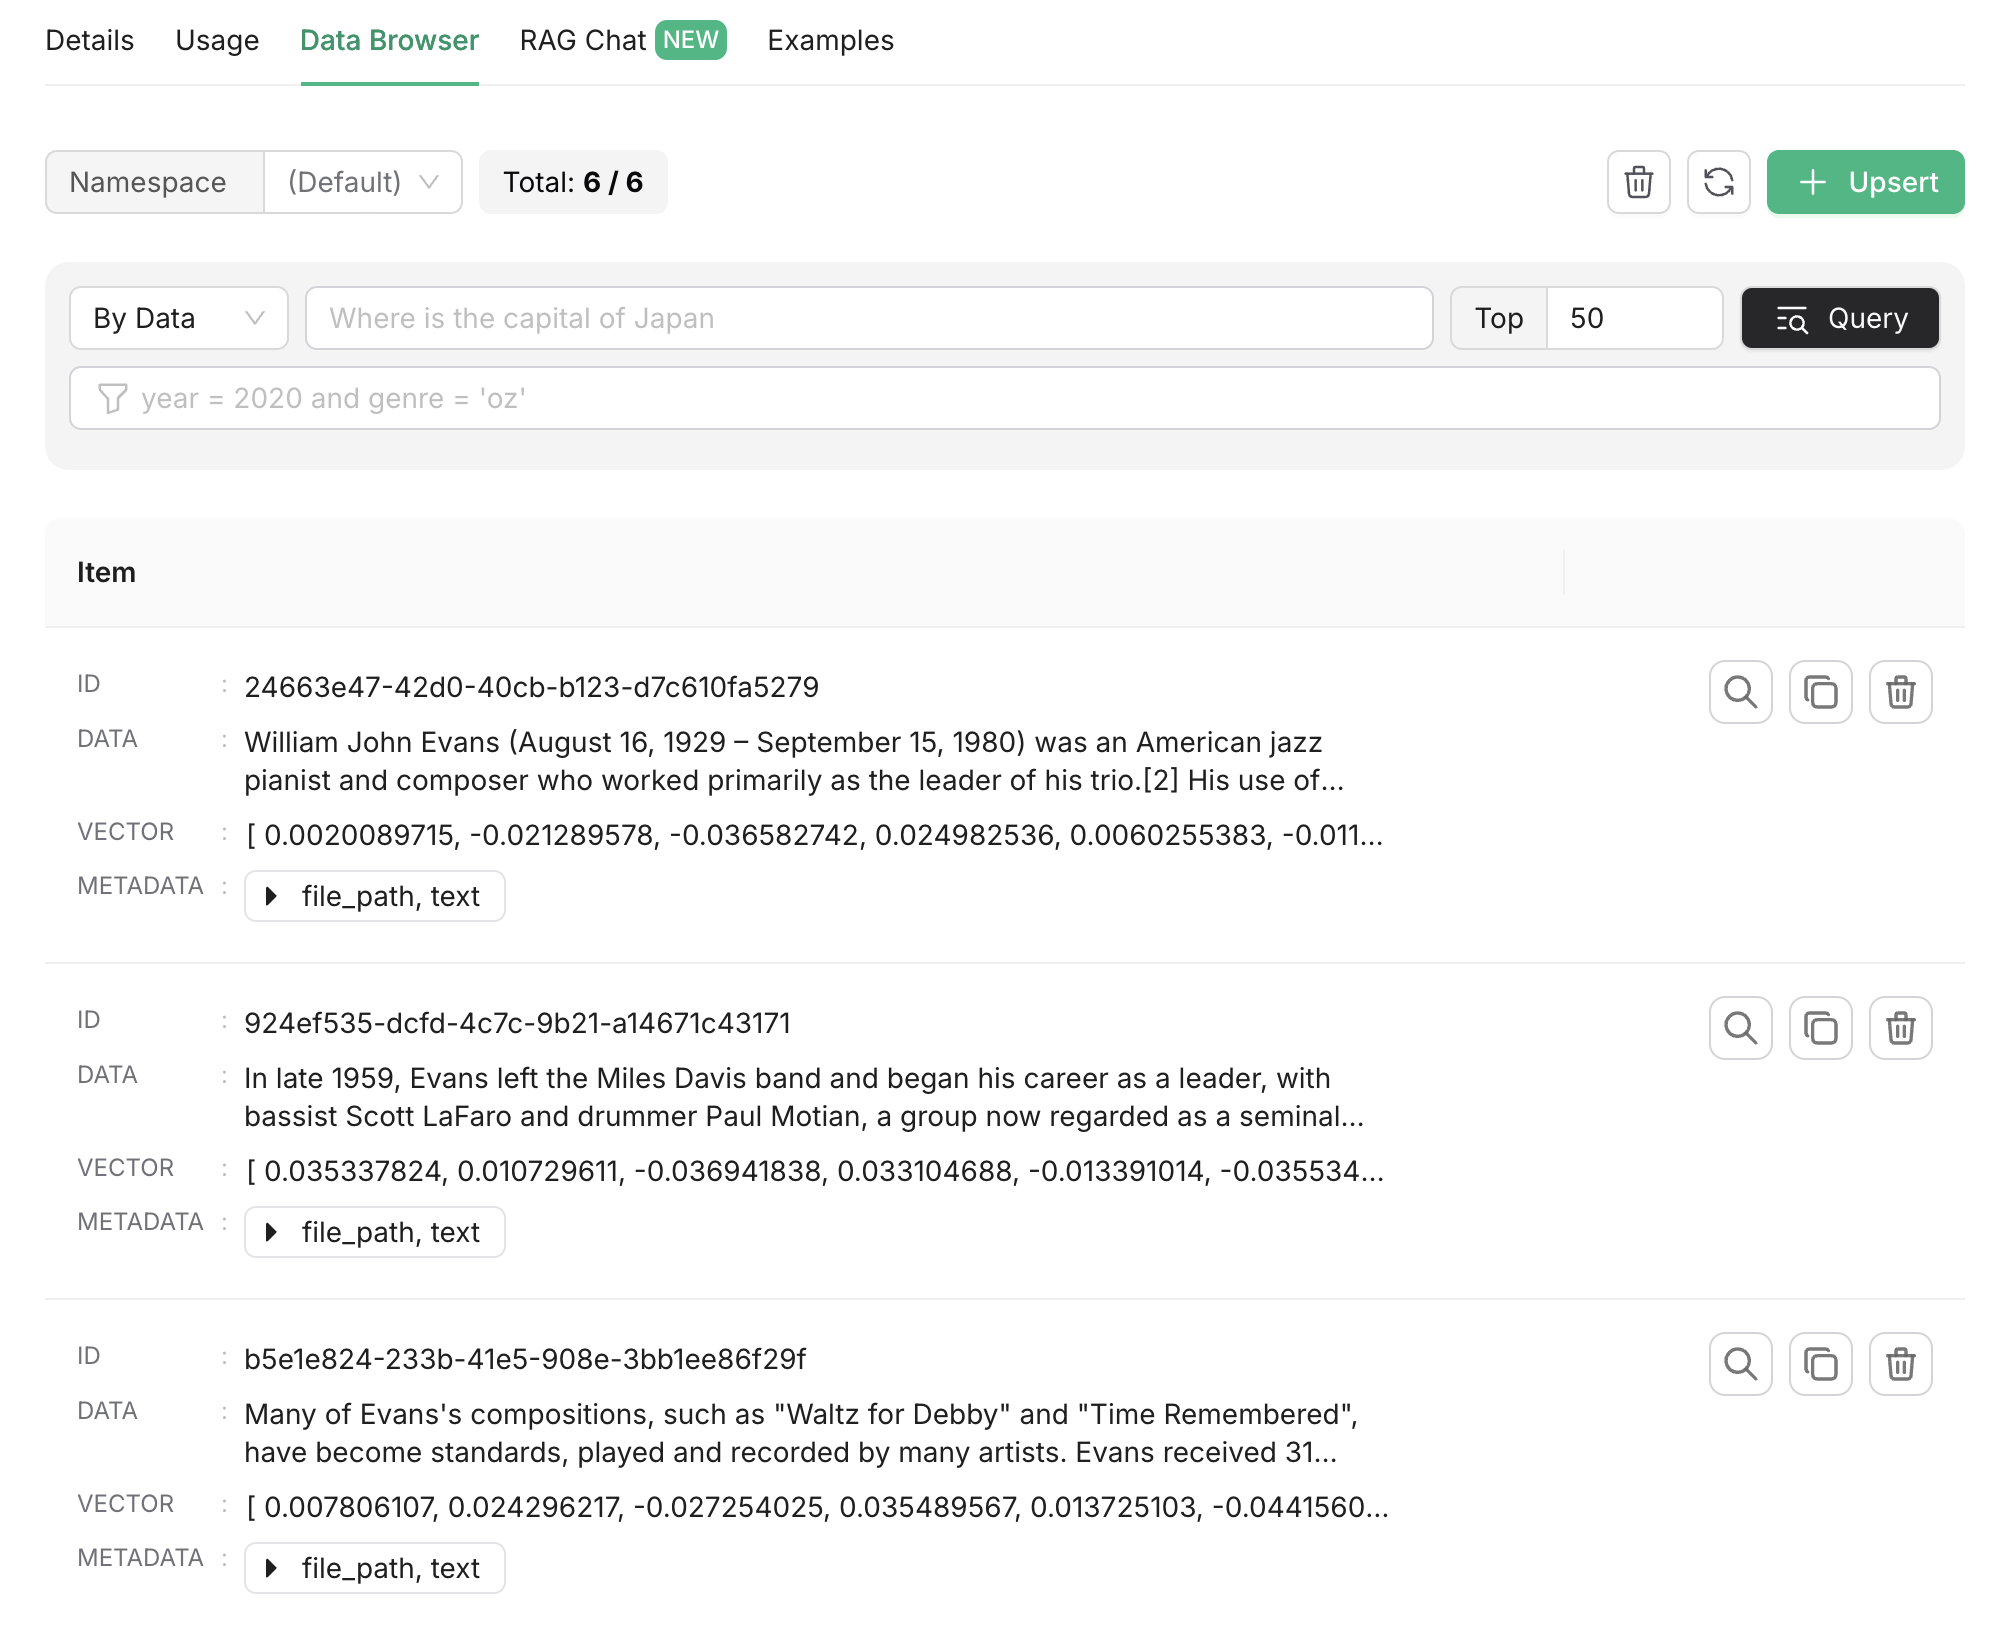
You can insert data into the index directly via the Upstash console’s "Data Browser" tab. However, in this example, we’ll use a Langflow workflow to insert data.
Create a workflow as shown below:
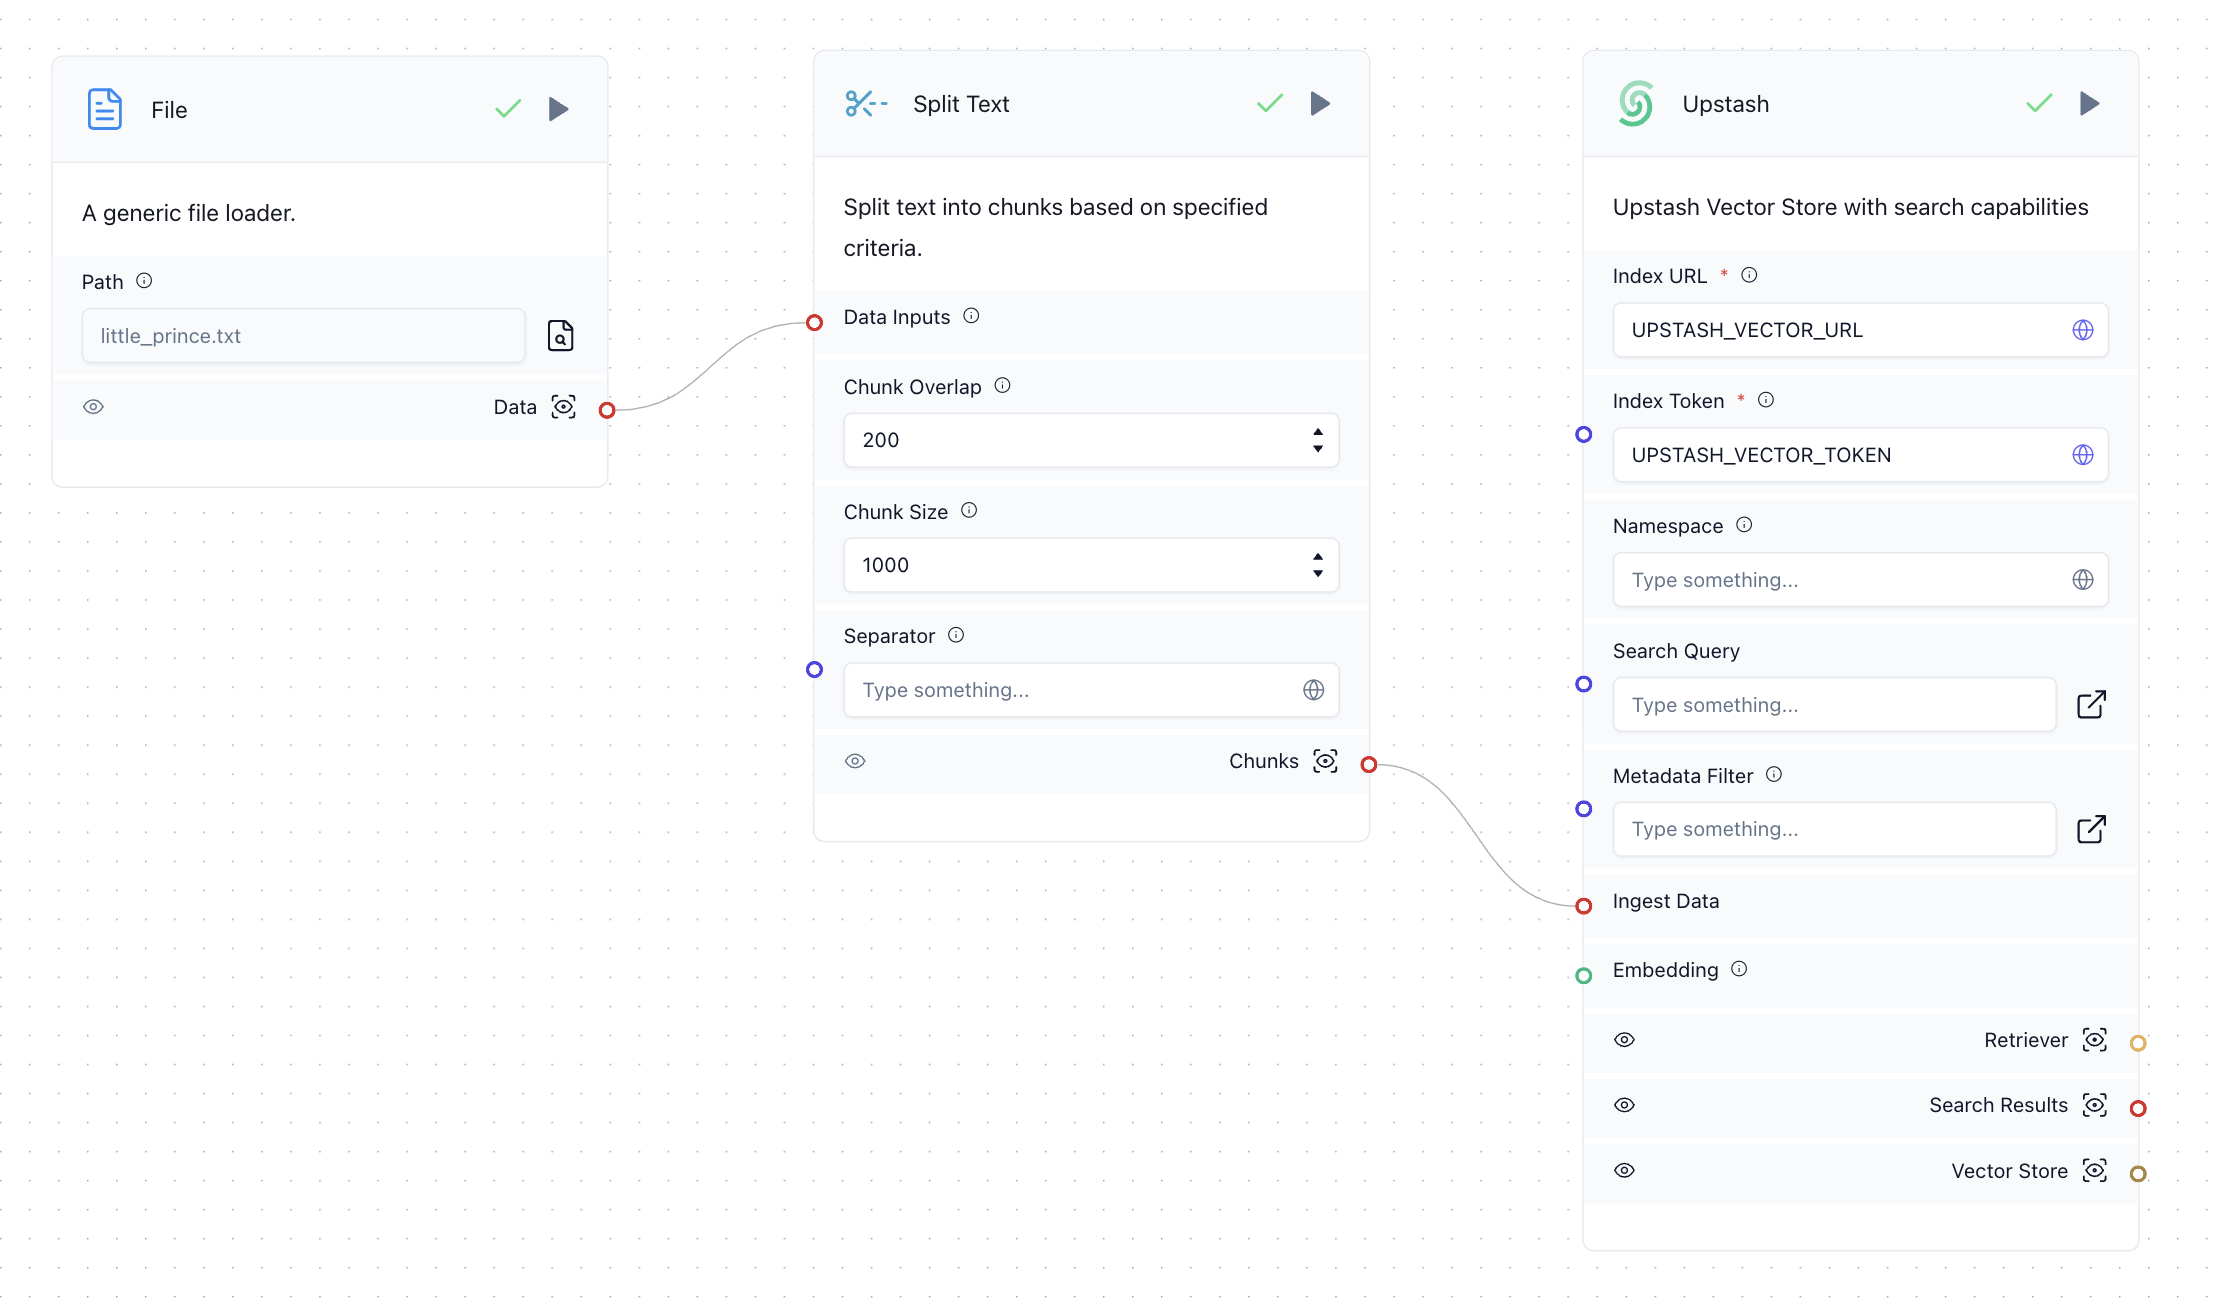
In this workflow:
- The "File" component converts an uploaded file into a string.
- The "Split" component splits the string into chunks of 1,000 characters.
- The "Upstash" component upserts the data into the Upstash Vector index.
The text chunks are automatically converted to vector embeddings, thanks to the bge-m3 model selected during index creation.
Upload a file to the "File" component and press the "Run" button on the "Upstash" component to insert data. You can verify the data in the "Data Browser" tab of the Upstash Vector console.
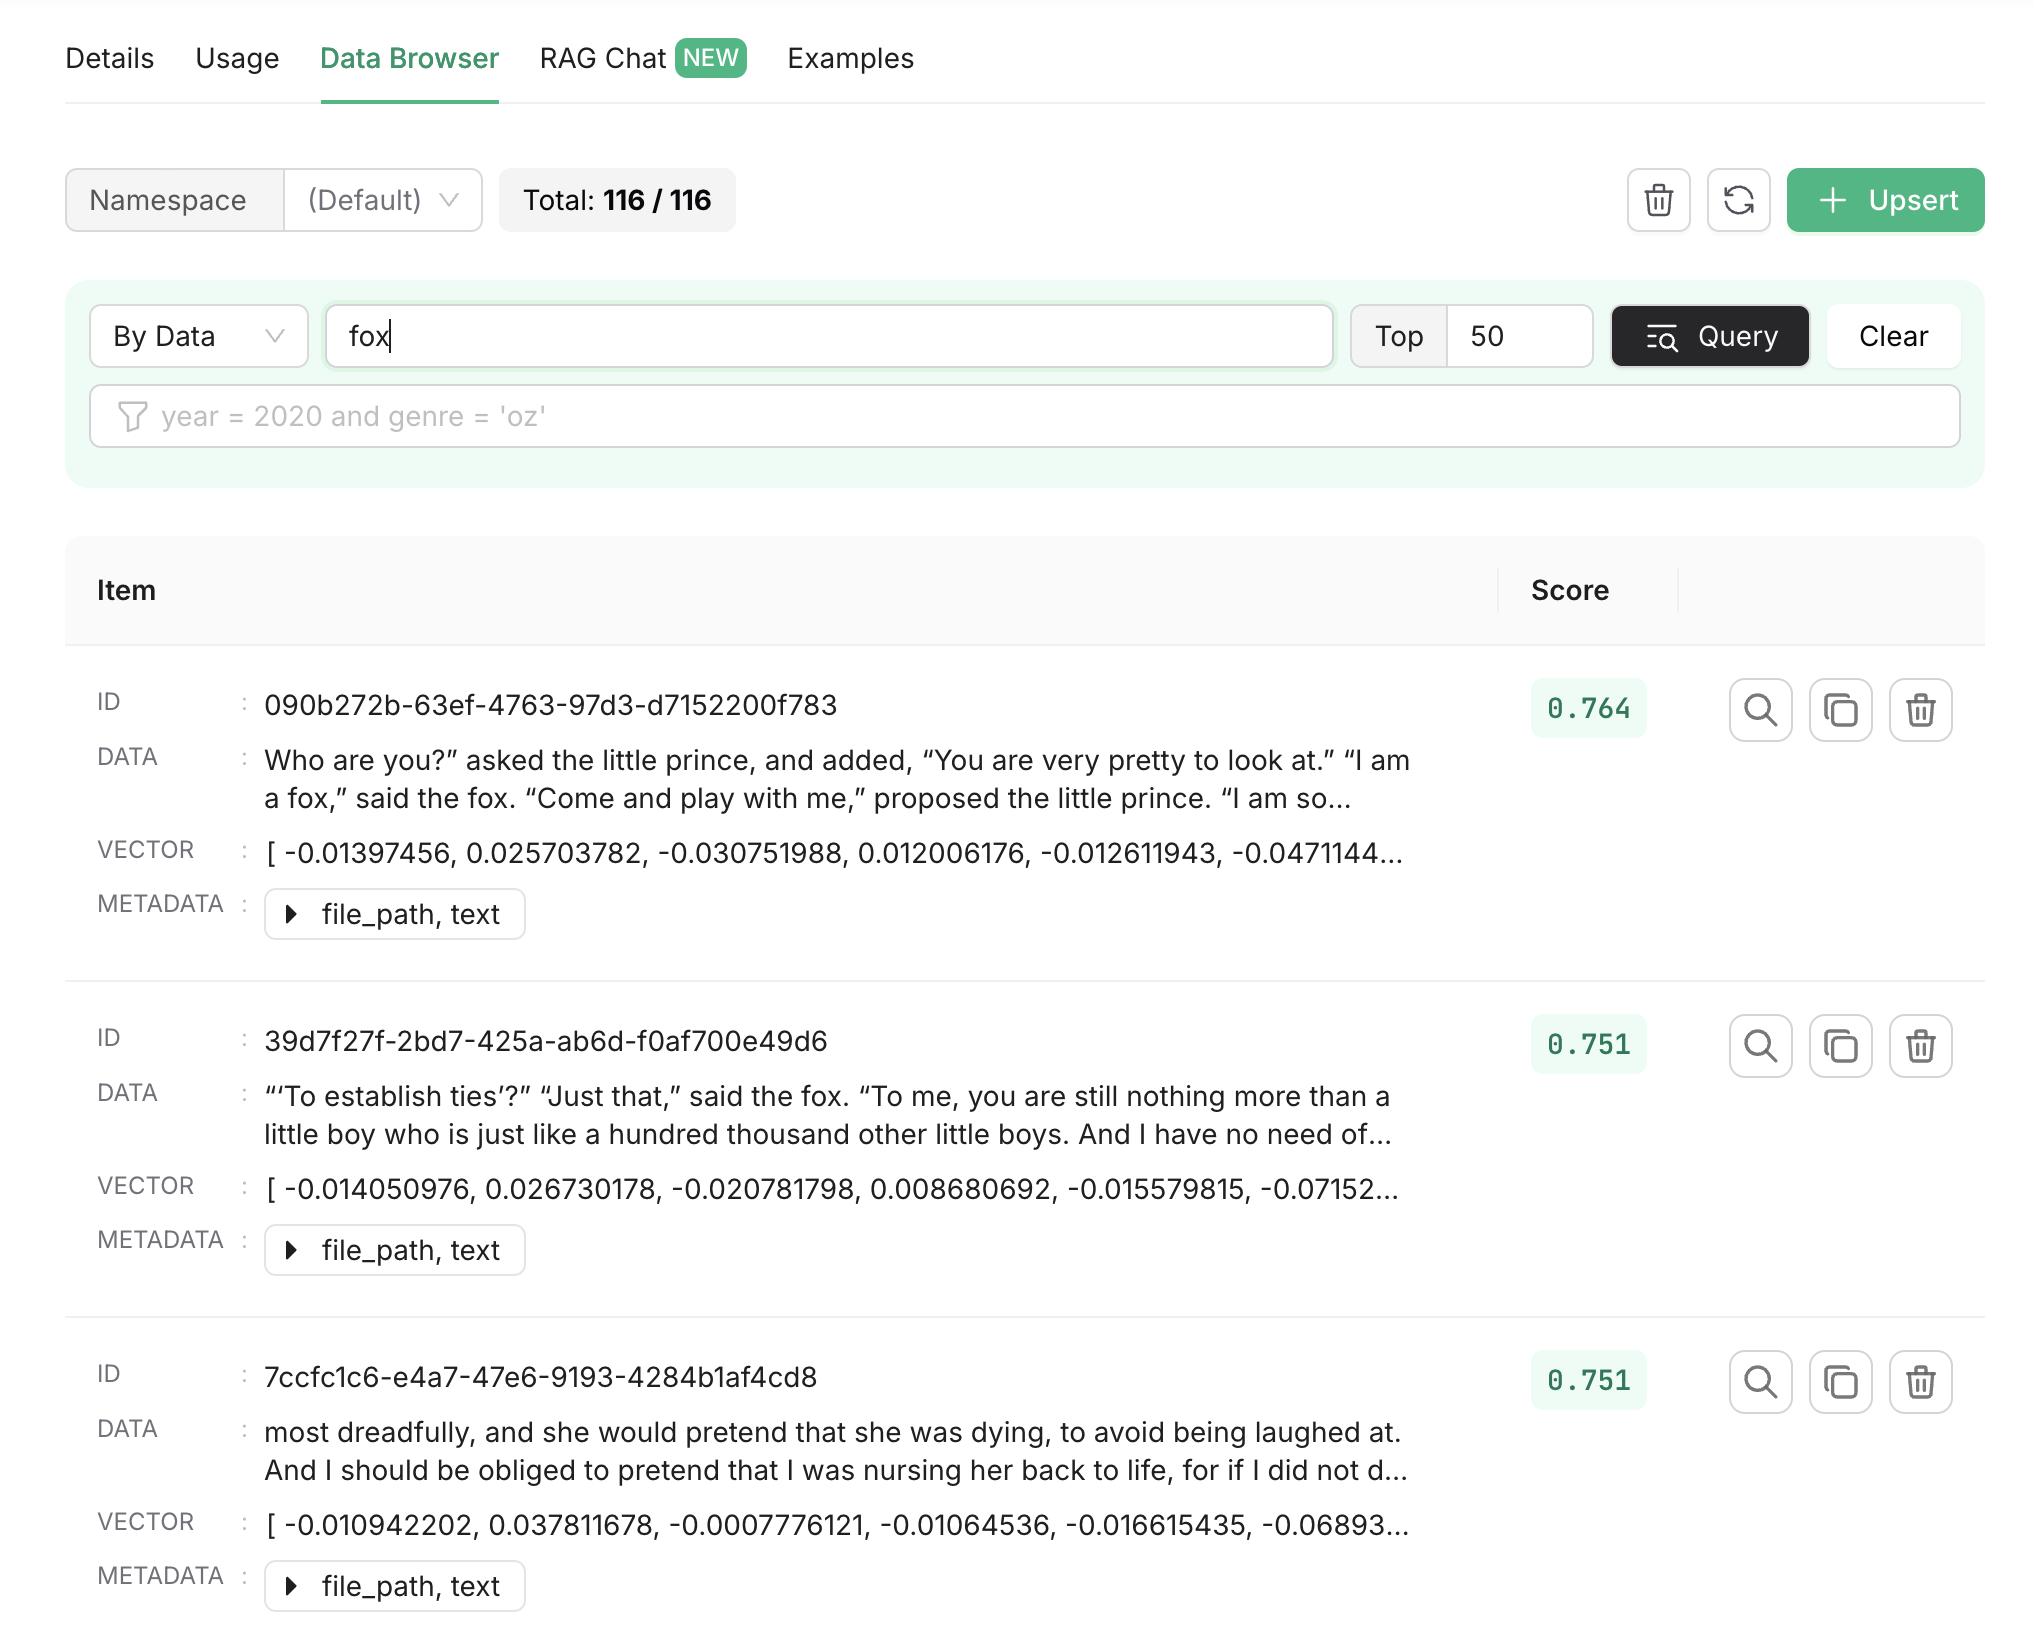
You can also perform a vector search within the index. The search string will be converted into a vector embedding, and the closest matches will be returned.
6. Adding RAG to the Chatbot
Now, let's enhance the chatbot by adding a step that searches the Upstash Vector index for relevant context based on the user’s input.
Create a "Prompt" component with a prompt that takes {context} and {question} as inputs.

Next, build the rest of the workflow as shown below:

The workflow will function as follows:
- The user inputs a question.
- The "Upstash" component searches the Upstash Vector index for context related to the user input.
- The "Parse Data" component extracts the text from the search results.
- Both the user’s input and the retrieved context are passed to the "Prompt" component.
- The prompt is then passed to the OpenAI component, which generates a response.
- The response is displayed to the user.
You can test the chatbot by entering a question into the "Chat Input" component and pressing the "Run" button on the "OpenAI" component.

You can also check the output of the "Upstash" component to see the context retrieved from the vector index.

By default, the "Upstash" component returns the top 4 results. For more accurate results, you can increase the topK parameter in the component settings.
Conclusion
In this tutorial, we demonstrated how to build a simple RAG chatbot using Langflow and Upstash Vector. This chatbot uses vector search to retrieve relevant context, enhancing its ability to generate more accurate and relevant responses.
You can also download the complete workflow file from here.
For more details on Upstash Vector, check out the Upstash Vector documentation.
