Would You Rather Game with LangChain, Redis, and the Query SDK
Redis is often used to speed up IO-based operations by providing a cache layer that stores data in-memory. Compared to traditional, relational databases, Upstash Redis boasts significantly faster read and write performance coupled with seamless scalability. While it doesn't allow you to form complex queries involving arbitrary properties, Redis is still versatile enough to emulate many features of relational databases through secondary indices.
Upstash provides a TypeScript SDK specifically for this purpose—@upstash/query. The SDK allows you to automatically create secondary indices on Redis data, and then query them using a simple, type-safe API. In this tutorial, we'll be using @upstash/query to create a "Would You Rather" game that generates questions and options using LangChain. You'll be able to vote for an option on each question, and have everything persist on Upstash Redis.
We'll build the application using Hono.js, a lightweight Bun-compatible web framework for the edge. We'll also use HTMX to send AJAX requests to our API, UnoCSS to build our interface, and @kitajs/html to directly serve HTML from our API endpoints with JSX. Thanks to Upstash, our application will be fully compatible with edge and serverless environments. We'll deploy our application using Cloudflare Workers.
This tutorial was inspired by a great video on using Redis as a database by Dreams of Code. You can find the full source code for this demo here.
Prerequisites
Getting started
Creating the project
First, we need to create a new Hono.js app. We'll be using Bun here, but you can use any package manager you want:
bun create hono@latest would-you-ratherWhen prompted, be sure to select cloudflare-workers. Even though we are using Bun to scaffold our project, the bun option is not what we are looking for. This will create a new project in the would-you-rather directory. Navigate to it, and install the remaining dependencies:
bun install @upstash/redis @upstash/query langchain openaiConfiguring the project
In order for our environment variables to be accessible in our Cloudflare Worker, we need to set them in our wrangler.toml. Append the following to the file:
[vars]
UPSTASH_REDIS_REST_URL="https://********.upstash.io"
UPSTASH_REDIS_REST_TOKEN="********"
OPENAI_API_KEY="sk-********"
To make our environment variables type-safe, we can modify our src/index.ts as follows:
export type Bindings = {
	UPSTASH_REDIS_REST_URL: string;
	UPSTASH_REDIS_REST_TOKEN: string;
	OPENAI_API_KEY: string;
};

const app = new Hono<{ Bindings: Bindings }>();
This will add the correct properties to our context.env. Before we first deploy our worker, we want to add logging for debugging purposes. This can be accomplished through a middleware that Hono already provides for us:
import { logger } from "hono/logger";

// snip

const app = new Hono<{ Bindings: Bindings }>();

app.use("*", logger());
Setting up JSX
Our first step is to rename the src/index.ts file to src/index.tsx, and to make the appropriate changes to the
scripts in package.json:
"scripts": {
	"dev": "wrangler dev src/index.tsx",
	"deploy": "wrangler deploy --minify src/index.tsx"
}
Then, we have to install a few packages to set up JSX.
bun install @kitajs/html @kitajs/ts-html-pluginIt is relatively straightforward to set up @kitajs/html. We just have to tell tsc to transpile JSX into calls to the @kitajs/html namespace. In addition, @kitajs/ts-html-plugin is an LSP plugin for the TypeScript language server. When we use JSX in our code, it will alert us about potential XSS vulnerabilities by emitting TypeScript errors. Adjust tsconfig.json as follows:
{
	"compilerOptions": {
		"jsx": "react",
		"jsxFactory": "Html.createElement",
		"jsxFragmentFactory": "Html.Fragment",
		"plugins": [{ "name": "@kitajs/ts-html-plugin" }]
	}
}
Make sure to remove the existing jsxImportSource property as it is no longer needed. Now, we can create a new file to store our Layout component, which serves as template HTML contianing the head and <!DOCTYPE html>. Create a src/layout.tsx and add the following:
import Html from "@kitajs/html";

export const Layout = ({ children }: Html.PropsWithChildren) => {
	return (
		<>
			{"<!DOCTYPE html>"}
			<html lang="en">
				<head>
					<meta charset="UTF-8" />
					<meta
						name="viewport"
						content="width=device-width, initial-scale=1.0"
					/>

					<script src="https://unpkg.com/htmx.org@1.9.6"></script>

					<title>Would You Rather</title>
				</head>
				<body>{children}</body>
			</html>
		</>
	);
};
Here, we made a new JSX component that provides all the boilerplate for an HTML page. We're also importing the script for HTMX here. We can use this component in our routes to directly render elements in <body>. Let's do this in our src/index.tsx so we can view the page:
import Html from "@kitajs/html";

import { Hono } from "hono";
import { logger } from "hono/logger";

import { Layout } from "./layout";
First, we import the Html namespace so our JSX can be transpiled properly. Then, we import our Layout component from earlier. Because @kitajs/html components get rendered to strings, serving them as HTML is as simple as follows:
app.get("/", (c) => c.html((<Layout>Hello world</Layout>) as string));We only have to cast it as a string because JSX.Element would be a Promise<string> if the component was async. Finally, add the following line at the top of the file to add typing for HTMX attributes:
/// <reference types="@kitajs/html/htmx.d.ts" />Setting up UnoCSS
In our app, we'll use UnoCSS for styling. We will use the UnoCSS CLI to scan our *.tsx files and generate a stylesheet. First, we need to install the CLI:
bun install -d unocssStart by creating a uno.config.ts file in the project root. This is how we tell the UnoCSS extension to enable itself. In addition, we'll specify where to find the preflight styles here.
import { defineConfig, presetUno } from "unocss";
import { readFile } from "node:fs/promises";

const path = "node_modules/@unocss/reset/tailwind.css";

export default defineConfig({
	presets: [presetUno()],
	preflights: [
		{
			layer: "base",
			getCSS: () => readFile(path, "utf-8"),
		},
	],
	content: {
		pipeline: {
			include: ["**.tsx"],
		},
	},
});
In order for the node:fs/promise import to not raise an error, we have to add the node types in tsconfig.json:
"types": ["@cloudflare/workers-types", "node"],Then, we can create a new script in our package.json:
"uno": "unocss **.tsx --preflights --minify --out-file static/uno.css",We are instructing UnoCSS to scan all *.tsx files in our project folder, and then to generate preflight styles as well as minified styles from our classes in static/uno.css. UnoCSS also has a --watch flag for use in development, but we don't have to include it because wrangler already does this for us.
Next, we have to tell wrangler to use this script when building our project. We can do this with a custom build, which lets us run our own build step before Cloudflare's one. Add this section to your wrangler.toml:
main = "workers-site/index.js"

[build]
command = "bun run uno"

[site]
bucket = "./static"
We also have to set up wrangler to serve static files. Under [site], we can specify which directory the static files are placed in. Along with this, we must also specify the main entrypoint for our site. Cloudflare can infer this as of now, but that behavior can change at any point because it relies on the deprecated site.entry-point field. Now is a good time to add the file to our.gitignore`:
uno.css
wrangler.toml
Since the uno.css file will be created in the static folder, we need some way to serve the contents of this folder to our app. We can do this with the serveStatic() handler provided by Hono.js:
import { Hono } from "hono";
import { logger } from "hono/logger";
import { serveStatic } from "hono/cloudflare-workers";

// snip

app.use("/*", serveStatic({ root: "./" }));
Finally, we can link the generated stylesheet in our HTML. Adjust src/layout.tsx as follows:
<link href="/uno.css" rel="stylesheet" type="text/css" />
<script src="https://unpkg.com/htmx.org@1.9.6"></script>
Deployment
Since we're using Cloudflare Workers, we can use wrangler to deploy our project. During development, you can run the following command with your preferred package manager:
bun run devwrangler will read our environment variables and spin up our Hono.js server, providing us with a local URL on port 8787 to test our project. At this point, we should only see a blank page with "Hello world" on it. If we wanted to test using edge preview sessions instead, we could replace our "dev" script with the following:
"dev": "wrangler dev src/index.tsx --remote",When you want to deploy, you can use the following command:
bun run deployOn the first run, this will walk you through signing into Cloudflare and setting up your project. Doing so will also allow you to view your Cloudflare Worker's configuration and logs.
Creating API endpoints
For organizational purposes, let's create a new Hono.js route group for our API endpoints. It will contain all endpoints that are prefixed with /api. Create a new file called src/api/index.ts:
import { Hono } from "hono";
import { type Bindings } from "..";

import { generate } from "./generate";
import { retrieve } from "./retrieve";
import { vote } from "./vote";

type Option = {
	text: string;
	votes: number;
};

export type Question = {
	id: number;
	text: string;
	options: Option[];
};

export const api = new Hono<{ Bindings: Bindings }>();

api.post("/generate", generate);
api.get("/retrieve", retrieve);
api.post("/vote", vote);
You can see we have defined two types: Option, which will represent a specific choice that the user can select in response to a "Would You Rather" question; and Question, which associates generated questions and options. We also created a placeholders for several routes here. We'll go through them one-by-one, but for now, you can create *.tsx files for each of them in the src/api folder (e.g. src/api/generate.tsx):
import Html from "@kitajs/html";

import { Query } from "@upstash/query";
import { Redis } from "@upstash/redis/cloudflare";

import { type Handler } from "hono";
import { type Question } from ".";

export const handler: Handler = async (c) => {
	return c.text("Hello world");
};
Be sure to rename the function from handler to the name of the file. We'll use HTMX to call these routes from the frontend to generate new questions using LangChain, retrieve previously generated questions, and to vote on specific options, respectively. Let's add this route group to the main app in src/index.tsx:
import { api } from "./api";

// snip

const app = new Hono<{ Bindings: Bindings }>();
app.route("/api", api);
Generating new questions
Now, we can add functionality in the /api/generate endpoint to generate a new question. We can start by creating an @upstash/query client inside src/api/generate.tsx:
export const generate: Handler = async (c) => {
	const redis = new Redis({
		url: c.env.UPSTASH_REDIS_REST_URL,
		token: c.env.UPSTASH_REDIS_REST_TOKEN,
		automaticDeserialization: false,
	});

	const query = new Query({ redis });

	return c.text("Hello world");
};
Here, we create a new Redis client using @upstash/redis, and then pass it into the Query client constructor. We have to pass all of our API keys manually, as Redis.fromEnv() can't read them automatically on Cloudflare Workers. Also, it's important to turn off automaticDeserialization as @upstash/query already does this for us. Using the Query client, let's create a collection for our questions:
const query = new Query({ redis });
const questions = query.createCollection<Question>("questions");
Now, we can create a searchable index under the collection using the id property we just defined:
const questions = query.createCollection<Question>("questions");
const questionsById = questions.createIndex({
	name: "questions_by_id",
	terms: ["id"],
});
Notice that since we supplied our Question type to createCollection before, the values of terms are fully type-safe! We can add as many terms as we see fit—even nested ones like options.length. In this case, we'll only be searching by id. Don't worry about this too much just yet, as we'll be using it when we retrieve existing questions.
In order to generate a question alongside its answer choices, let's create structured output with OpenAI functions. We'll create a schema and convert it into an OpenAI function, which the LLM is forced to call in order to return the response in the correct format.
This is a replacement for StructuredOutputParser that doesn't require output instructions to be included in the prompt. It produces more reliable results, especially with higher temperature values—which is the case in this demo. First, install the following packages to create our schema:
bun install zod zod-to-json-schemaThen, still inside src/api/generate.tsx, we can import these packages and create the schema:
import { z } from "zod";
import { zodToJsonSchema } from "zod-to-json-schema";

// snip

const questionSchema = z.object({
	text: z
		.string()
		.describe(
			"The actual text of the would-you-rather question that gets presented to the user."
		),
	options: z
		.array(
			z
				.string()
				.describe(
					"The actual text of an option that get presented to the user."
				)
		)
		.describe("The options that the user can choose from."),
});
We're now ready to generate the question with LangChain. Again, we'll have to supply our API key manually to the ChatOpenAI model.
import { ChatOpenAI } from "langchain/chat_models/openai";
import { JsonOutputFunctionsParser } from "langchain/output_parsers";

export const generate: Handler = async (c) => {
	// snip

	const llm = new ChatOpenAI({
		openAIApiKey: c.env.OPENAI_API_KEY,
		temperature: 1,
	});

	const model = llm.bind({
		functions: [
			{
				name: "output_formatter",
				description: "Should always be used to properly format output",
				parameters: zodToJsonSchema(questionSchema),
			},
		],
		function_call: { name: "output_formatter" },
	});

	// snip
};
Binding function_call forces the model to always call the specified function. Since we're specifically using the function to retrieve output, we have to include it. The next step is to parse the output.
const outputParser = new JsonOutputFunctionsParser();
const chain = model.pipe(outputParser);

const response = (await chain.invoke(
	"Generate a fun, never-before-heard-of question for a would-you-rather game."
)) as z.infer<typeof questionSchema>;
For simplicity's sake, in this demo, we are carefully wording the prompt to avoid duplicate questions as best we can. In an actual application, you can use something like BufferMemory along with UpstashRedisChatMessageHistory in a ConversationChain to properly ensure there are no repeated questions.
response should match the schema we passed in earlier, so we type it as such. Before we can save the question LangChain generated, we need a way to create ids for our questions. Let's use a new Redis key to store the number of questions we have generated, so we can increment the key each time we make a new question.
const id = await redis.incr("num_questions");This is as simple as calling one function using @upstash/redis. The incr() method automatically creates the key and initializes it to 0 if it doesn't exist, and then increments the key and returns the new value. Now, we can use this id when creating and storing our question:
const question: Question = {
	id,
	text: response.text,
	options: response.options.map((option) => ({
		text: option,
		votes: 0,
	})),
};

await questions.set(id, question);
We did a small amount of manipulation on the response from LangChain in order to make it fit our Question type from earlier. We can now return the generated question to the frontend:
const html = (
	<div id="question">
		<p>Question: {question.text}</p>
		{question.options.map((option) => (
			<div>
				<p>Option: {option.text}</p>
				<p>Votes: {option.votes}</p>
			</div>
		))}
	</div>
);

return c.html(html as string);
Finally, let's add the correct HTMX attributes to our src/index.tsx so we can call the /api/generate endpoint from the frontend:
app.get("/", (c) => {
	const html = (
		<Layout>
			<button
				hx-post="/api/generate"
				hx-disabled-elt="this"
				hx-target="#question"
				hx-swap="outerHTML"
				hx-trigger="click"
			>
				Generate new question
			</button>

			<div id="question"></div>
		</Layout>
	);

	return c.html(html as string);
});
We tell the button to call /api/generate when click is triggered, and then to replace the #question div with the returned response. HTMX will also disable the button for us for the duration of the request. Notice that the #question div matches what we're returning from our /api/generate endpoint.
At this stage, you should be able to test what we wrote:
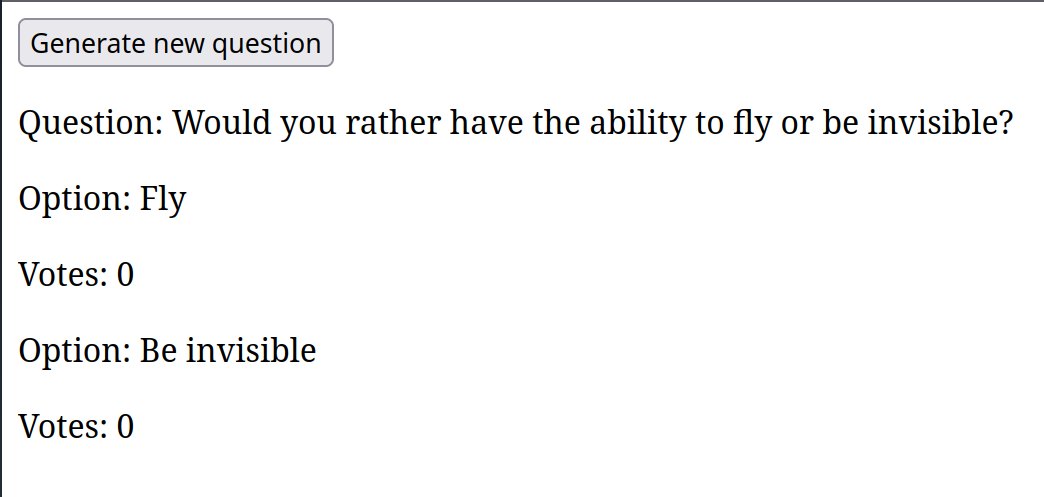
bun run devAfter pressing Generate new question, you should see something like this:

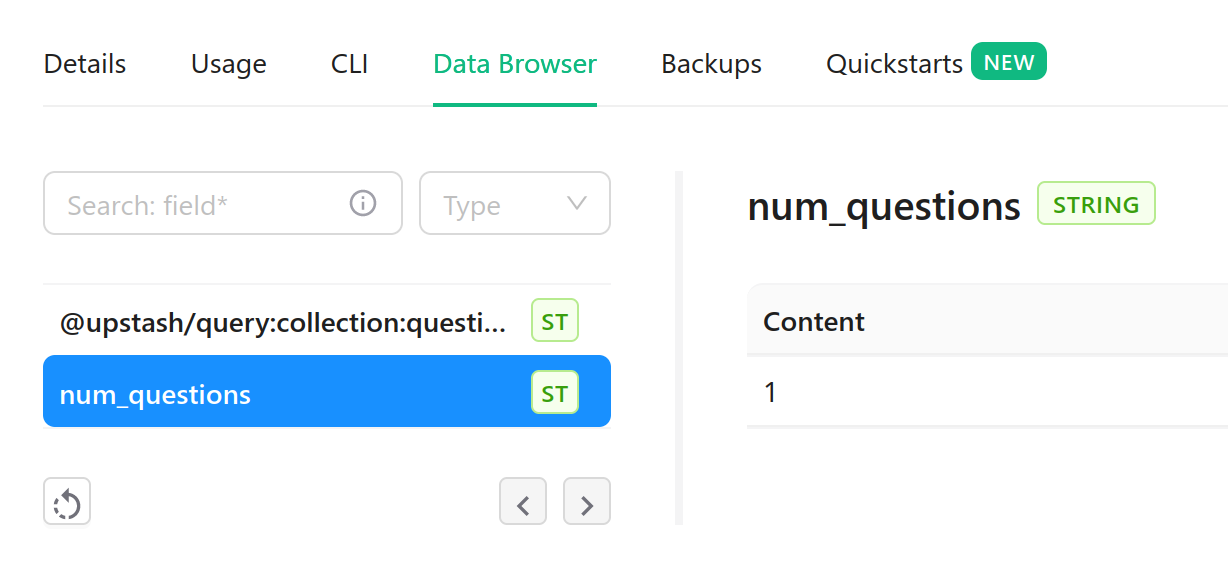
In the Upstash Redis database, you should see two new keys being populated:


Retrieving existing questions
Like before, let's create a new Redis client, attach it to our Query client, and create the collection for our questions. Modify src/api/retrieve.tsx as follows:
export const retrieve: Handler = async (c) => {
	const redis = new Redis({
		url: c.env.UPSTASH_REDIS_REST_URL,
		token: c.env.UPSTASH_REDIS_REST_TOKEN,
		automaticDeserialization: false,
	});

	const query = new Query({ redis });
	const questions = query.createCollection<Question>("questions");
	const questionsById = questions.createIndex({
		name: "questions_by_id",
		terms: ["id"],
	});

	return c.text("Hello world");
};
We also create the index again so we can search the questions by id. Let's find the id using the num_questions key we created earlier:
const numQuestions = (await redis.get("num_questions")) as string;
const id = Math.floor(Math.random() * parseInt(numQuestions)) + 1;

const documents = await questionsById.match({ id });
const question = documents[0].data;
Since we are incrementing num_questions every time we create a new question, numQuestions represents the highest id in our Redis database. Since we want to retrieve a random question, all we have to do is find an id that lies between 1 and numQuestions, inclusive.
Finally, we can query by this id to retrieve all matching documents. Again, our match() call is completely type-safe thanks to the Question type we passed in earlier. In our case, documents will only contain one document (the question), so we just pick the first item in the list. We can now return the question to the frontend:
const html = (
	<div id="question">
		<p>Question: {question.text}</p>
		{question.options.map((option) => (
			<div>
				<p>Option: {option.text}</p>
				<p>Votes: {option.votes}</p>
			</div>
		))}
	</div>
);

return c.html(html as string);
The final step is to create a new button in our src/index.tsx so we're also able to retrieve existing questions:
<button
	hx-post="/api/generate"
	hx-disabled-elt="this"
	hx-target="#question"
	hx-swap="outerHTML"
	hx-trigger="click"
>
	Generate new question
</button>

<button
	hx-get="/api/retrieve"
	hx-disabled-elt="this"
	hx-target="#question"
	hx-swap="outerHTML"
	hx-trigger="click"
>
	Retrieve existing question
</button>
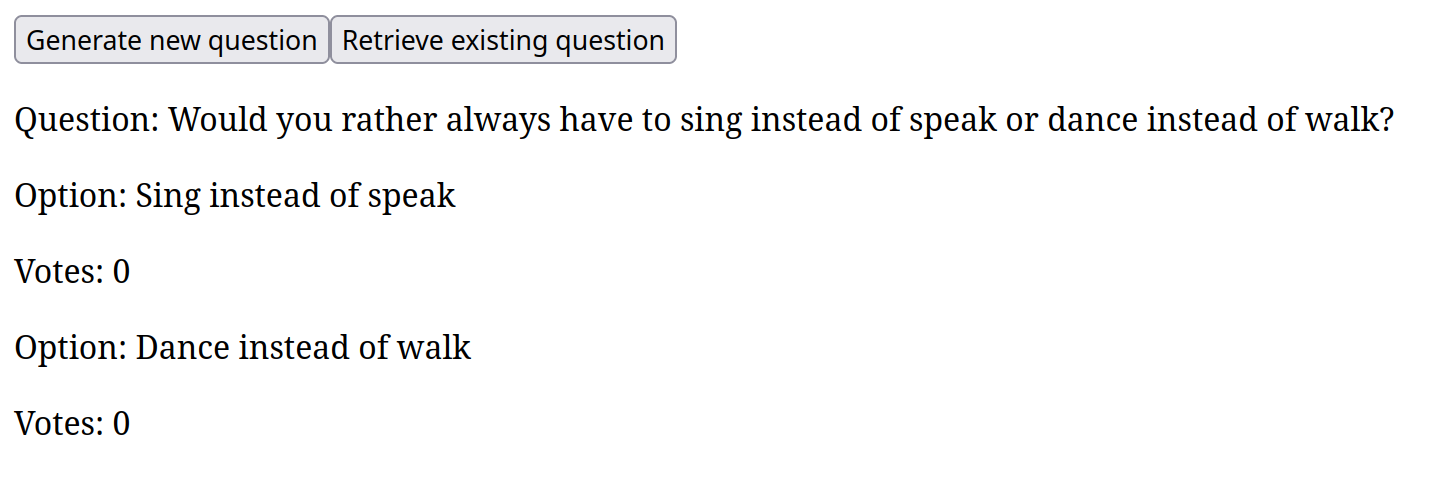
Press Generate new question a few times to increase the number of random questions the code can choose from. Then try Retrieve existing question. The page should now be populated with a question that generated earlier:

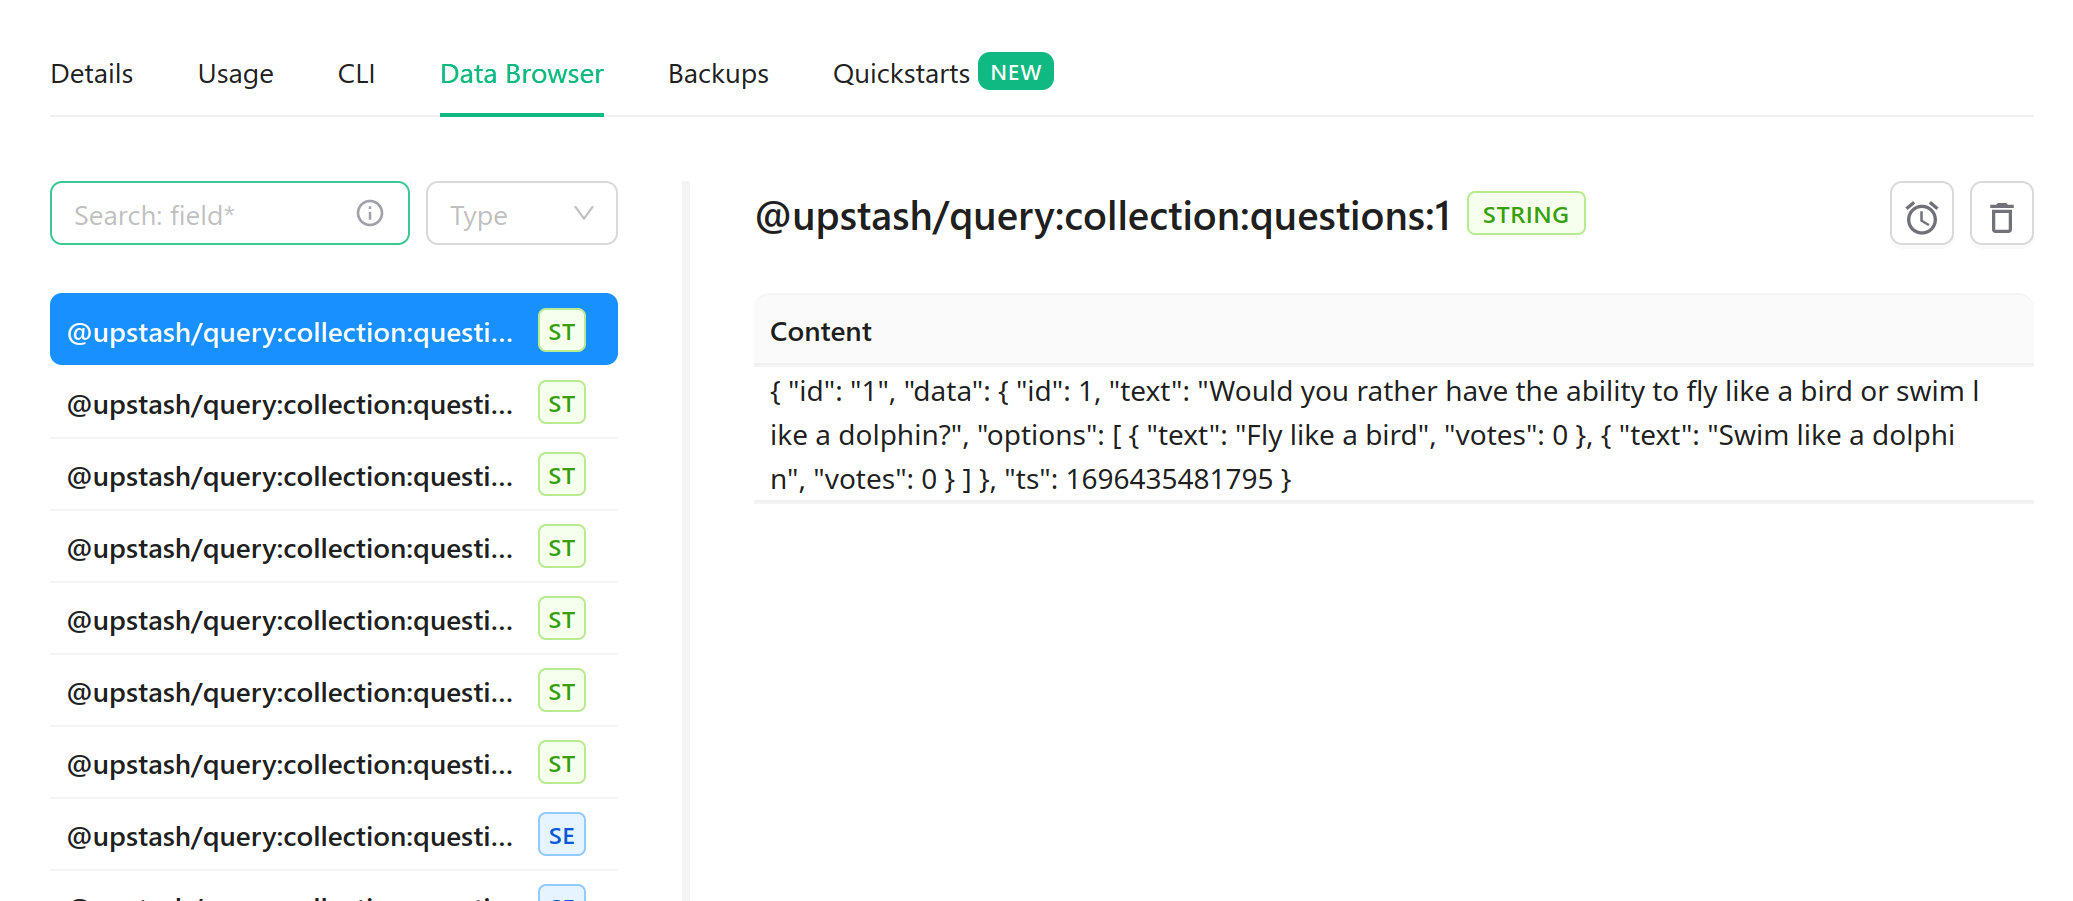
You should also see the num_questions key in your Upstash Redis database being incremented, along with new STRING (ST) and SET (SE) keys being created by @upstash/query:

Voting on questions
Let's add the ability to vote on questions. We'll create a new endpoint at /api/vote that accepts a POST request. From the frontend, we'll be passing the id of the question we want to vote on, as well as the index of the option we want to vote for. Modify src/api/vote.tsx as follows to retrieve the id and option index from the querystring:
export const vote: Handler = async (c) => {
	const { questionId, optionIdx } = await c.req.param();

	const id = parseInt(questionId);
	const option = parseInt(optionIdx);

	return c.text("Hello world");
};
We'll be using the same Redis and Query clients as before, so we can just copy and paste the code from earlier:
export const vote: Handler = async (c) => {
	// snip

	const redis = new Redis({
		url: c.env.UPSTASH_REDIS_REST_URL,
		token: c.env.UPSTASH_REDIS_REST_TOKEN,
		automaticDeserialization: false,
	});

	const query = new Query({ redis });
	const questions = query.createCollection<Question>("questions");
	const questionsById = questions.createIndex({
		name: "questions_by_id",
		terms: ["id"],
	});

	// snip
};
Again, we can use match() to retrieve the question we want to vote on. Then, we can increment the votes property of the option we want to vote for, update() the question, and return it to the frontend:
const documents = await questionsById.match({ id });
const question = documents[0].data;

question.options[option].votes += 1;

await questions.update(questionId, question);

const html = (
	<div id="question">
		<p>Question: {question.text}</p>
		{question.options.map((option) => (
			<div>
				<p>Option: {option.text}</p>
				<p>Votes: {option.votes}</p>
			</div>
		))}
	</div>
);

return c.html(html as string);
The code for /api/vote is mostly the same as /api/retrieve. However, we have no way of actually calling the /api/vote endpoint yet.
Building the frontend
First, let's modify our src/layout.tsx slightly to facilitate adding styles to other components:
<body class="overflow-hidden h-screen">{children}</body>Now, we can add a proper header to our app in src/index.tsx:
<Layout>
	<header class="flex flex-row justify-between px-3 h-[3.75rem] bg-zinc-950">
		<button
			class="shrink-0 rounded-md bg-sky-400 text-sky-700 p-2 my-auto"
			hx-get="/api/retrieve"
			hx-disabled-elt="this"
			hx-target="#question"
			hx-swap="outerHTML"
			hx-trigger="click"
		>
			<svg
				xmlns="http://www.w3.org/2000/svg"
				width="24"
				height="24"
				viewBox="0 0 24 24"
				fill="none"
				stroke="currentColor"
				stroke-width="2"
				stroke-linecap="round"
				stroke-linejoin="round"
				class="lucide lucide-refresh-ccw"
			>
				<path d="M21 12a9 9 0 0 0-9-9 9.75 9.75 0 0 0-6.74 2.74L3 8" />
				<path d="M3 3v5h5" />
				<path d="M3 12a9 9 0 0 0 9 9 9.75 9.75 0 0 0 6.74-2.74L21 16" />
				<path d="M16 16h5v5" />
			</svg>
		</button>

		<h1 class="text-md sm:text-xl py-4 text-center text-white font-bold uppercase my-auto">
			Would you rather...
		</h1>

		<button
			class="shrink-0 rounded-md bg-emerald-400 text-emerald-700 p-2 my-auto"
			hx-post="/api/generate"
			hx-disabled-elt="this"
			hx-target="#question"
			hx-swap="outerHTML"
			hx-trigger="click"
		>
			<svg
				xmlns="http://www.w3.org/2000/svg"
				width="24"
				height="24"
				viewBox="0 0 24 24"
				fill="none"
				stroke="currentColor"
				stroke-width="2"
				stroke-linecap="round"
				stroke-linejoin="round"
				class="lucide lucide-copy-plus"
			>
				<line x1="15" x2="15" y1="12" y2="18" />
				<line x1="12" x2="18" y1="15" y2="15" />
				<rect width="14" height="14" x="8" y="8" rx="2" ry="2" />
				<path d="M4 16c-1.1 0-2-.9-2-2V4c0-1.1.9-2 2-2h10c1.1 0 2 .9 2 2" />
			</svg>
		</button>
	</header>

	<div
		id="question"
		class="grid items-center p-16 h-[calc(100vh-3.75rem)] bg-zinc-900 text-white"
	>
		<p class="text-4xl text-center font-bold">
			Press one of the two buttons above to play
		</p>
	</div>
</Layout>
Now, we can create a new component for our question that we'll share across each API endpoint. Create a new file called src/components/question.tsx:
import Html from "@kitajs/html";
import { type Question } from "../api";

interface QuestionProps {
	question: Question;
	showResults?: boolean;
}

export const QuestionContainer = ({ question, showResults }: QuestionProps) => {
	const votes = question.options.reduce((s, option) => s + option.votes, 0);

	return (
		<div
			id="question"
			class="h-[calc(100vh-3.75rem)] bg-zinc-900 text-white"
		>
			<div class="flex flex-col h-[calc(100%-1rem)]">
				<div class="shrink-0 flex justify-center py-4">
					<h1 class="w-3/4 text-center text-xl">
						{question.text.replace("Would you rather", "").trim()}
					</h1>
				</div>

				<div class="flex flex-col h-full sm:flex-row gap-2 px-4">
					{question.options.map((option, idx) => (
						<button
							hx-post={`/api/vote?questionId=${question.id}&optionIdx=${idx}`}
							hx-disabled-elt="this"
							hx-target="#question"
							hx-swap="outerHTML"
							hx-trigger="click"
							disabled={showResults}
							class="basis-1/2 flex flex-col justify-center items-center p-16 bg-zinc-800 w-full h-full rounded-md even:bg-blue-600 odd:bg-red-600"
						>
							{showResults && (
								<p class="text-7xl font-extrabold">
									{Math.trunc((100 * option.votes) / votes)}%
								</p>
							)}
							<p class="break-words text-4xl text-center uppercase font-bold">
								{option.text}
							</p>
						</button>
					))}
				</div>
			</div>
		</div>
	);
};
We just copied and pasted the question HTML we were using in every API route, with some stylistic changes. There are a few new additions, however. We're removing "Would you rather" from each question.text because we already included that phrase in our title.
We also added HTMX attributes to the buttons so we can call the /api/vote endpoint by pressing an option. Using JSX, we can dynamically construct the query string using the values available to us on the question object. Let's update all of our API routes to use this component:
import { QuestionContainer } from "../components/question";

// snip

return c.html((<QuestionContainer question={question} />) as string);
You can now remove the const html lines from before. We also added a showResults prop to the component, which will determine whether or not to show the percentage of votes for each option. This will also disable voting afterward. When calculating the percentage, the toal number of votes is found by calling reduce() on the options. While two of our routes can ignore this prop, the /api/vote route must set it to true:
<QuestionContainer question={question} showResults />Conclusion
With the new QuestionContainer component and style updates to the / route, our app now looks like this:

Selecting an option successfuly calls the /api/vote endpoint and updates the option's vote count, which is reflected on our frontend as well as the Upstash Redis console:


